Thursday, September 13, 2012
The Spicy Bird
A friend and I used to go to a NY style deli during our lunch at work and they had a sandwich called "The Spicy Bird." It was your typical sub sandwich with turkey and pepperoni. I don't think I've made a turkey sandwich without pepperoni since. I love deli turkey but the pepperoni gives it that little kick.
Today for lunch I made a Spicy Bird panini with mayo, Havarti and mozzarella cheese, lettuce, turkey, and pepperoni. I would have included some pickle slices but we didn't have any around.
This isn't the only way to enjoy a Spicy Bird. Try your own combination and share it with us!
Wednesday, September 12, 2012
Unicorn Poop Cookies
No, these aren't real unicorn poop but if unicorns do poop this is probably what it looks like.
Again, I'm not sharing a recipe here but showing a technique.
First, whip up your favorite sugar cookie recipe (I used the Betty Crocker cookbook). Divide the dough into 6 pieces and die each piece a color (red, orange, yellow, green, blue, and purple). Roll each piece into a 10 inch snake.
Roll out a piece of clear plastic wrap. Lay down the pieces in ROYGBV order side by side. Then carefully wrap them into a log as shown below. Twist the ends to make it tight and refrigerate for 2 hours.
Once the dough has hardened take it out and roll it into a long snake (I dusted the countertop with powdered sugar). As it gets longer you will want to break it in half and continue working with it. Continue rolling and halving it until you get about 1/2" diameter snakes. Cut the snakes into 4" lengths.
Now it's time to shape the cookies. You want to pile them up so they look like, well, poop.
Bake them as directed by your recipe, and cool on a cooling rack.
As they are baking whip up a batch of icing. You don't want anything that will cover up the design of the cookies, so I just mixed powdered sugar and milk into a thin icing (I forgot to sift the sugar which was a big no-no so there were clumps). Spoon it over the cookies when they are still on the cooling rack (put a paper towel underneath because a lot of excess will drip off). I also added some edible shimmer to the cookies with a paintbrush.
And there you have it, the most delicious unicorn poop you've ever tasted!
Buffalo Burgers
Ever had a buffalo burger? If not, you're missing out.
I saw our local grocery store advertise buffalo meat for $6.99/lb which is the same price we pay for beef off-sale (I NEVER pay that for beef as I stock up when it is on sale, but that's not the point) so I picked up a pound. After eating this burger I wished I had picked up two pounds!
You don't need to go all crazy with spices and flavorings with buffalo. I just sprinkle in a little salt and pepper and it's delicious!
There aren't any big secrets or special recipes to share, I just wanted to give you something different to work with.
For this meal I made homemade sesame seed buns (recipe here). I followed the ingredient list and used the bread machine to do all the work. Once the dough was ready I shaped it, let it double (I actually fell asleep because I wasn't feeling well and they more than doubled) and baked it. They turned out AWESOME! I highly recommend that recipe.
I made approximately 1/2 lb burgers for my husband and a mini-burger for my son. Brown up the patties as you would with hamburger, add some cheese, and voila!
Labels:
bread machine,
Dinner,
Easy,
Entree,
Lunch,
So Good You Won't Care How Bad It Is,
Stovetop
Sunday, August 19, 2012
Juicy Lucy with Bacon
If you're looking for a healthy recipe, you're looking at the wrong post. This is a special treat that we only make once or twice a year. I'm not even going to calculate the P+ on this one...just know it isn't good for you, but it's amazing! This is what I classify as a "so good you won't care how bad it is" recipes.
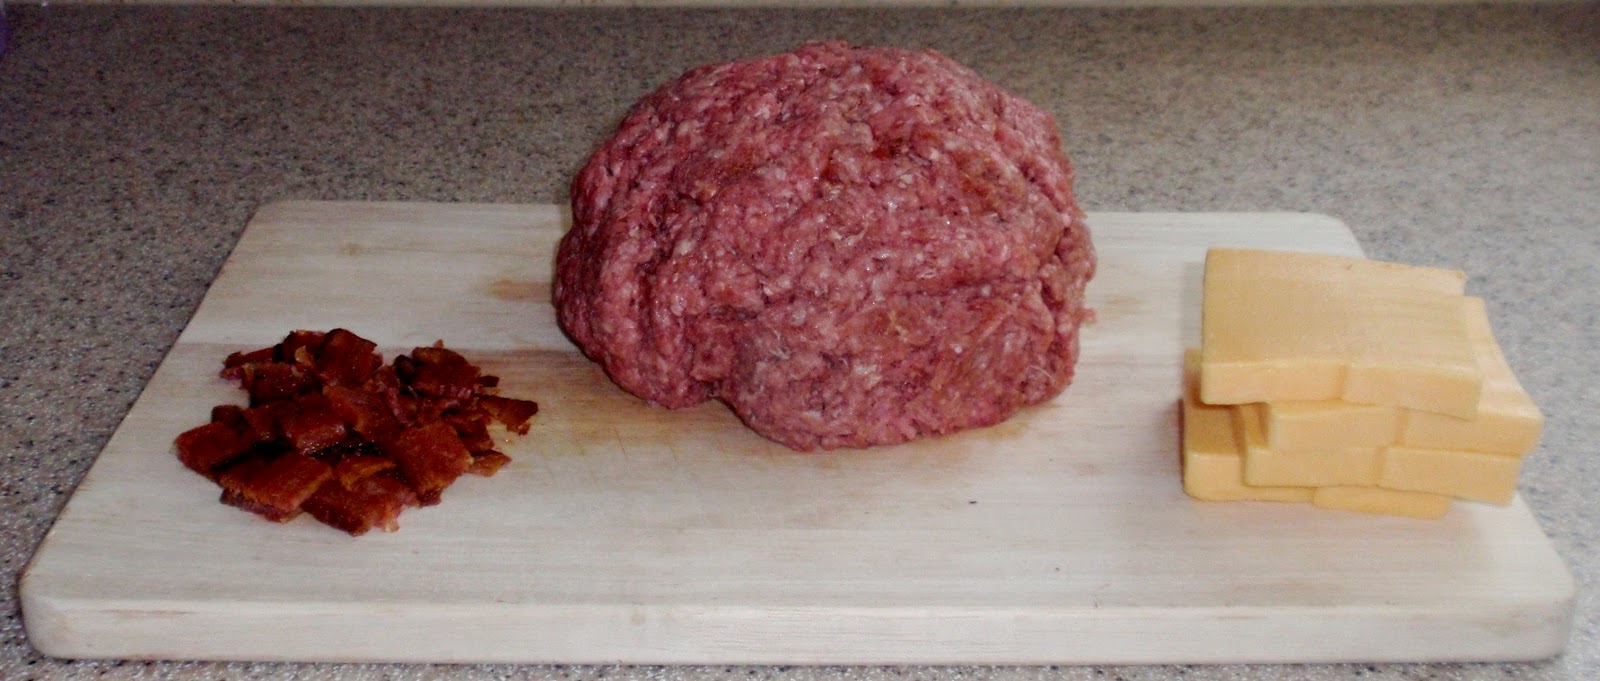
I don't usually give step-by-step photo instructions but in this case I think it's easiest. Enjoy!

Time for assembly. Treat the burger as if it were any other burger. Top with sliced cheese, bacon, and and any other toppings you would like. Serve immediately.
WARNING! The cheese in the burger is HOT! Be careful!
The fun of this recipe is you can use almost any kind of cheese and other ingredients. What combinations can you come up with? Try them out and share your ideas with us!
I don't usually give step-by-step photo instructions but in this case I think it's easiest. Enjoy!
Ingredients:
2 lb 80/20 ground beef
Seasoning (I used Weber Gourmet Burger but you can use salt and pepper or the seasoning of your choice)
4 oz American cheese, cut into 4 slices (I used Velveeta)
10 slices center cut bacon
4 American cheese slices
Directions:
Prepare bacon (see Baking Bacon). Chop 2 pieces and set the rest aside.
Season beef with desired seasoning. Separate into 8 pieces and form into patties.
Top four of the patties with the American cheese and bacon. Place the other 4 patties on top of the bacon and cheese to enclose the cheese and bacon.
Ok, this is the most important part. You want to seal the two patties together well so they don't separate when cooking. Press down the edges of the top burger until it is completely blended into the burger on the bottom. Flip the entire thing and form into a thick patty. Continue until you have 4 patties.
Place a skillet over medium-high heat. Once pan is hot, place the patties in the pan. Once the first side has a good sear flip to sear the second side. When second side has seared, flip again and turn heat down to medium low. Cook and flip until both sides are done (use a thermometer as these take a lot longer than a regular burger). Let burgers rest for 5 minutes.
Time for assembly. Treat the burger as if it were any other burger. Top with sliced cheese, bacon, and and any other toppings you would like. Serve immediately.
WARNING! The cheese in the burger is HOT! Be careful!
The fun of this recipe is you can use almost any kind of cheese and other ingredients. What combinations can you come up with? Try them out and share your ideas with us!
Labels:
Beef,
Dinner,
Entree,
Lunch,
So Good You Won't Care How Bad It Is
Saturday, August 11, 2012
John Frieda Hair Products Promo at Rite Aid
This promotion has already expired, but I wanted to show you as another example of how to get great deals. I went to Rite Aid this week and bough JF shampoo, conditioner, and foaming hair color.
Shampoo $6.99
+ Conditioner $6.99
+ Hair Dye $12.99
Total Retail Value $26.97
What I paid:
Promo: Buy 1 JF Shamp/Cond get one 1/2 off
Shampoo $6.99
+ Conditioner $3.49
Promo: Buy 2 Shamp/Cond get $3 Register Rewards
- $3.00
Promo: JF Hair Dye $11.99
+ Hair Dye $11.99
Promo: Buy 1 JF Hair Dye get $2 Register Rewards
- $2 Register Rewards
Coupon: Buy two JF hair products, get $10 off JF hair dye
- $10 Coupon
Total Paid: $ 7.47
That's a total savings of $19.50 or 72%!!! Yeah buddy!
Maple Berry Oatmeal Cups (2 P+)
Here's another baked oatmeal recipe. I wanted to make something a little different than the last batch and make it a little lighter. I omitted the butter and made a couple other changes. I also decided to make a smaller batch because I only have one 12 cup muffin tin so I only have to bake one batch. I hope you like it!
Maple Berry Oatmeal Cups
12 Servings, 45 minutes
PRINTABLE
Ingredients:
1 c steel cut oats
9 strawberries, quartered
36 blueberries
¼ c walnuts, chopped
1 c milk
1 egg
¼ c brown sugar
2 t cinnamon
2 t maple syrup
½ t baking soda
¼ t salt
Instructions:
Preheat oven to 375°. Line a muffin tin with 12 paper liners.
Divide the oats between the 12 muffin
liners (approximately 1 ½ T each).
Divide the berries between the muffin tins
(3 blueberries and ¾ strawberry each).
Top with walnuts.
Combine the remaining ingredients in a
medium bowl and mix well. Divide
and pour into the muffin cups (muffin cups should end up ¾ full).
Bake for approximately 20-25 minutes, until
liquid has set.
Cool for 5 minutes before moving to a
cooling rack.
Notes:
Put into an airtight container and store in the fridge for a few
days. You can eat them cold or
warm them for 45
Perfect Chocolate Chip Cookies (4 P+)
Nestle's Tollhouse Chocolate Chip recipe is tried and true, but you can do better than that. Once you figure out the exact time to keep them in your oven, they will be perfect every time. I find they are best before they turn golden brown and I get the perfect doneness at 11 minutes in my oven. They are crisp and crunch on the bottom but soft and chewy on the top. Yum, yum, YUM! I cannot get over how good these cookies are.
Perfect Chocolate Chip Cookies
30 cookies, 60 minutes
PRINTABLE
Perfect Chocolate Chip Cookies
30 cookies, 60 minutes
PRINTABLE
Ingredients:
1 c whole wheat
flour
1 c white flour
½ t baking soda
¼ t salt
1 c sugar
1 c brown sugar
¼ cup butter, melted
2 egg whites
2 t vanilla
1 c mini chocolate
chips
Instructions:
Preheat oven to 350°. Line a cookie sheet with a silicone
baking liner.
In a medium bowl, whisk together flour,
baking soda, and salt.
In a large bowl, whisk together sugars,
butter, egg whites, and vanilla.
Continue whisking for 3-5 minutes.
Next, it’s time to incorporate the dry
ingredients into the wet ingredients.
Only add ¼ of the flour mixture to the wet mixture at a time and be sure
to thoroughly combine by whisking before adding the next portion.
Once the flour has been fully
incorporated, remove the dough from the whisk with a rubber spatula. Fold in the chocolate chips with the
spatula.
Using a cookie scoop, place 12-15 dough
balls on silicone baking liner spacing them 2 inches apart.
Bake for approximately 11 minutes.
Cool for 3-5 minutes before moving to a
cooling rack.
Notes:
To get the cookies
the perfect crisp bottom while still being soft on the top I think it is
necessary to use a silicone baking liner such as a Silpat.
A cookie scoop is a
must as well. If the cookies
aren’t all the same size and shape they will cook unevenly so having them
uniform is essential.
Make sure the butter
isn’t still hot because you are introducing it to raw egg whites and you don’t
want to start cooking them until they get in the oven.
Don’t break out the
electric mixer for this one. You
can do it with a whisk and a little elbow grease (ok, it’s a lot of elbow
grease).
Labels:
3-5 P+,
Cookies,
Desserts,
Oven,
whole wheat
Subscribe to:
Posts (Atom)