Showing posts with label Lunch. Show all posts

Thursday, September 13, 2012

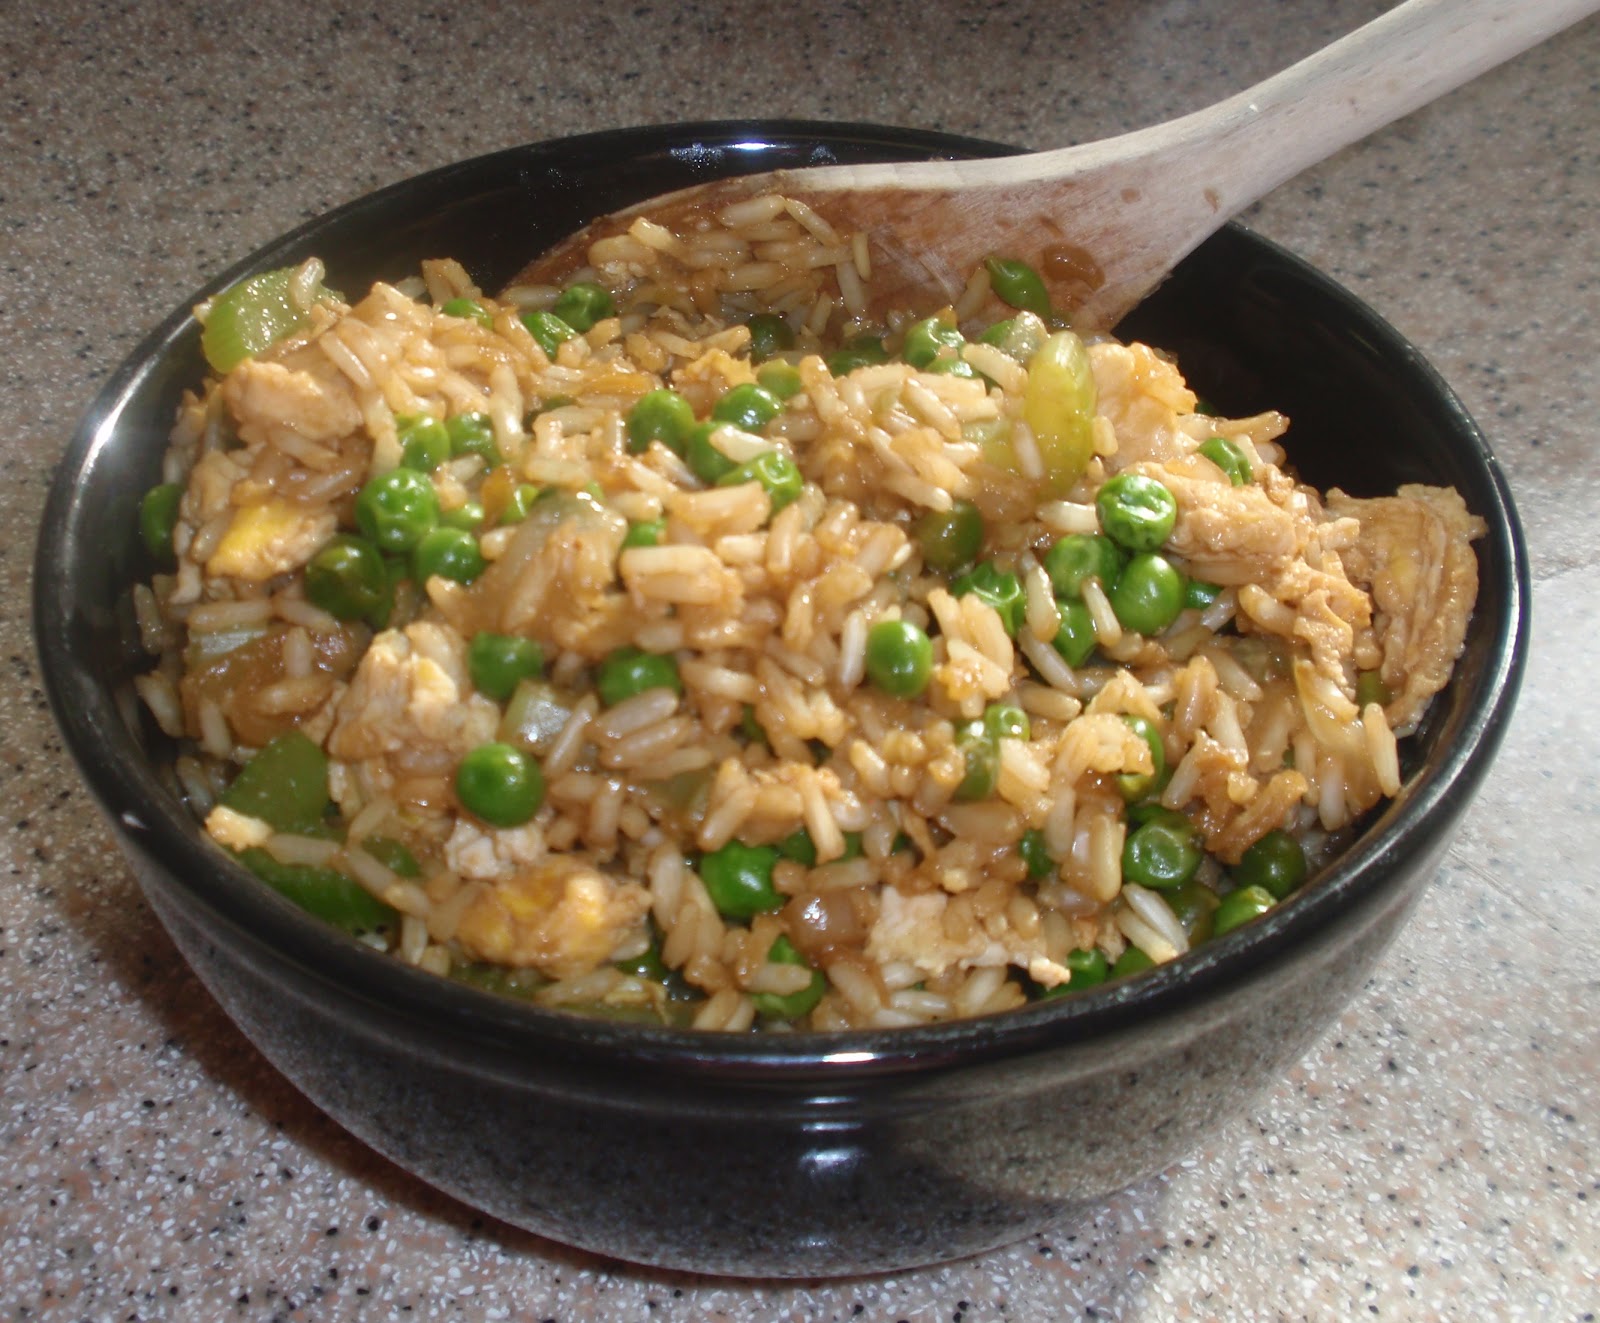
Chicken Fried Rice

Pin It Now!


Chicken Fried Rice
Serves 4-6

Ingredients:
2 c chicken broth or stock
1 c brown rice
2 t oil
1/2 onion, chopped
1 c mushrooms, chopped
3 carrots, chopped
1-2 chicken breasts, diced
2 cloves garlic, minced
1/2 c frozen peas
2 eggs, scrambled
1/4 c soy sauce
1/4 c rice vinegar


Instructions:
Place broth and rice into a saucepan and bring to a boil; cover and cook 30-45 minutes until rice is tender (broth need not be completely dissolved).
Meanwhile, in a large saucepan heat oil.  Add onion, mushrooms, and carrots and cook until tender.  
Add chicken and garlic; cook until chicken is cooked through.  Add cooked rice and peas.
Push everything in the pan over to one side.  Add the eggs to the free side; stir and cook until cooked through.  
Stir eggs into the rice mixture.  Add soy sauce and vinegar.  
Serve.

Notes:
Fried rice is great because you can really throw in any vegetables that you have around the house.  You can serve it as an entree or side dish.

Sesame Green Beans

Pin It Now!

My favorite sushi restaurant is in Chesapeake, VA and they make the most amazing sesame spinach dish.  I make a spinach dish but also incorporate the flavors into other vegetables like green beans.


Sesame Green Beans
Serves 4

Ingredients:
1 lb green beans, trimmed
1 T rice vinegar
2 t sesame oil
1 t sesame seeds

Instructions:
Place a steamer basket in a large pot with 1 inch of water; bring to a boil.
Add green beans to basket, cover, and cook until tender; about 20 minutes.
Meanwhile, in a small bowl mix vinegar and oil.
When beans have cooked through place in a medium bowl.  
Pour vinegar/oil mixture over beans and toss to coat
Top with sesame seeds.

Notes:
Sesame oil is VERY strong.  Add a little bit at a time until you find a taste that you like.

Asian Inspired CrockPot Chicken

Pin It Now!
Our family loves Asian food, be it chow mien or sushi.  I have made a few recipes but wanted to try something for the CrockPot.  Another thing that inspired this recipe is we buy whole chickens as they are much cheaper than buying them in pieces.  We use the breasts in various ways, we fry up the legs and wings and slather on buffalo sauce, but I never know what to do with the thighs.  Problem solved!


Asian Inspired CrockPot Chicken
4 Servings

Ingredients:
6 chicken thighs (boneless, skinless)
1/4 c soy sauce
2 T rice wine vinegar
1/4 c sake
2 T honey
1 c chicken stock or broth
2 T ginger, minced
3 cloves garlic, minced
1/4 c onion, chopped
1 T chili paste (found in the Asian aisle of the supermarket)
Salt
Pepper
2 T sesame seeds
4 T cornstarch
4 T water

Instructions:
Place chicken in Crockpot.
In a medium bowl mix all remaining ingredients except sesame seeds, cornstarch, and water.
Pour liquid mixture over chicken; top with sesame seeds.
Cook for 6 hours on low.
After 6 hours, remove chicken and set aside while leaving sauce in CrockPot.  
Mix cornstarch and water in a small bowl until cornstarch is dissolved.  
Add cornstarch slurry to CrockPot.  
Turn CrockPot on high and cook an additional 15 minutes.  
Pour sauce over chicken and serve.

The Spicy Bird

Pin It Now!

A friend and I used to go to a NY style deli during our lunch at work and they had a sandwich called "The Spicy Bird."  It was your typical sub sandwich with turkey and pepperoni.  I don't think I've made a turkey sandwich without pepperoni since. I love deli turkey but the pepperoni gives it that little kick.

Today for lunch I made a Spicy Bird panini with mayo, Havarti and mozzarella cheese, lettuce, turkey, and pepperoni.  I would have included some pickle slices but we didn't have any around.

This isn't the only way to enjoy a Spicy Bird.  Try your own combination and share it with us!

Wednesday, September 12, 2012

Buffalo Burgers

Pin It Now!

Ever had a buffalo burger?  If not, you're missing out.

I saw our local grocery store advertise buffalo meat for $6.99/lb which is the same price we pay for beef off-sale (I NEVER pay that for beef as I stock up when it is on sale, but that's not the point) so I picked up a pound.  After eating this burger I wished I had picked up two pounds!

You don't need to go all crazy with spices and flavorings with buffalo.  I just sprinkle in a little salt and pepper and it's delicious!

There aren't any big secrets or special recipes to share, I just wanted to give you something different to work with.

For this meal I made homemade sesame seed buns (recipe here).  I followed the ingredient list and used the bread machine to do all the work.  Once the dough was ready I shaped it, let it double (I actually fell asleep because I wasn't feeling well and they more than doubled) and baked it.  They turned out AWESOME!  I highly recommend that recipe.

I made approximately 1/2 lb burgers for my husband and a mini-burger for my son.  Brown up the patties as you would with hamburger, add some cheese, and voila!

Sunday, August 19, 2012

Juicy Lucy with Bacon

Pin It Now!
If you're looking for a healthy recipe, you're looking at the wrong post.  This is a special treat that we only make once or twice a year.  I'm not even going to calculate the P+ on this one...just know it isn't good for you, but it's amazing!  This is what I classify as a "so good you won't care how bad it is" recipes.

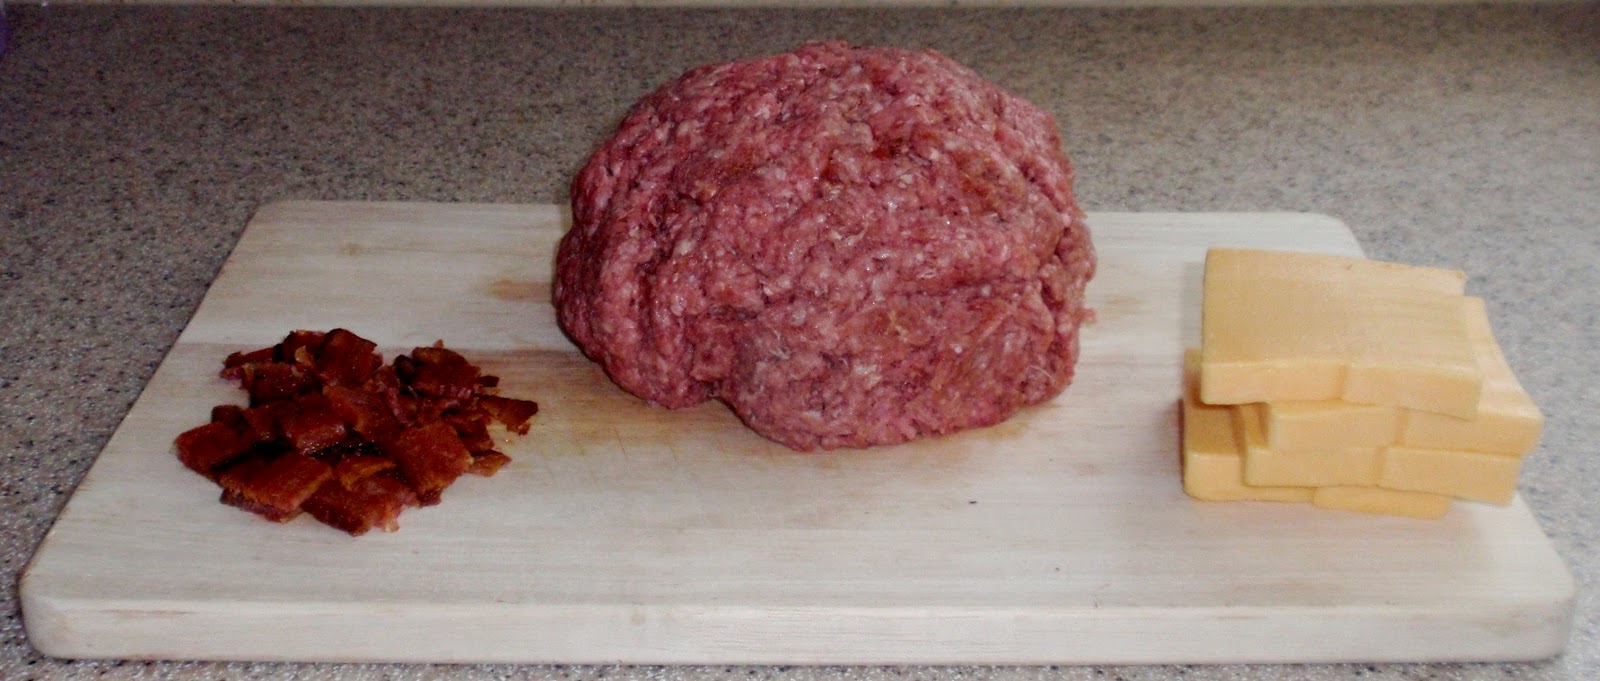
I don't usually give step-by-step photo instructions but in this case I think it's easiest.  Enjoy!


Ingredients:
2 lb 80/20 ground beef
Seasoning (I used Weber Gourmet Burger but you can use salt and pepper or the seasoning of your choice)
4 oz American cheese, cut into 4 slices (I used Velveeta)
10 slices center cut bacon
4 American cheese slices
4 hamburger buns
Directions:
Prepare bacon (see Baking Bacon).  Chop 2 pieces and set the rest aside.

Season beef with desired seasoning.  Separate into 8 pieces and form into patties.  


Top four of the patties with the American cheese and bacon.  Place the other 4 patties on top of the bacon and cheese to enclose the cheese and bacon.

Ok, this is the most important part.  You want to seal the two patties together well so they don't separate when cooking.  Press down the edges of the top burger until it is completely blended into the burger on the bottom.  Flip the entire thing and form into a thick patty.  Continue until you have 4 patties.

Place a skillet over medium-high heat.  Once pan is hot, place the patties in the pan.  Once the first side has a good sear flip to sear the second side.  When second side has seared, flip again and turn heat down to medium low.  Cook and flip until both sides are done (use a thermometer as these take a lot longer than a regular burger).  Let burgers rest for 5 minutes.


 Time for assembly.  Treat the burger as if it were any other burger.  Top with sliced cheese, bacon, and and any other toppings you would like.  Serve immediately.

WARNING!  The cheese in the burger is HOT!  Be careful!

The fun of this recipe is you can use almost any kind of cheese and other ingredients.  What combinations can you come up with?  Try them out and share your ideas with us!


Wednesday, July 25, 2012

Guacamole Salad (4 P+)

Pin It Now!
Guacamole Salad
8 Servings, 15 Minutes
PRINTABLE


Ingredients:
4 avocados, skin and seed removed, ½” dice
4 plum tomatoes, seeded and diced
½ white onion, sliced
2 limes, juice only
1 T fresh cilantro, chopped
salt, to taste

Instructions:
In a medium bowl, gently mix all ingredients.  Serve immediately.

Notes:
The lime juice will help to keep the avocado from browning but can’t prevent it completely.  If storing, cover with plastic wrap, pressing out as much air as possible and refrigerate.

Chicken Wild Rice Casserole (10 P+)

Pin It Now!
Chicken Wild Rice Casserole
8 Servings, 75 Minutes
PRINTABLE


Ingredients:
7 ½ c chicken broth, divided
2 c wild rice mix
3 T butter
1 onion, chopped
2 stalks celery, chopped
2 cloves garlic, smashed
3 T flour
½ c milk
1 can sliced mushrooms, drained
1 can green beans, drained
1 can water chestnuts, drained and chopped
2 c cooked chicken, shredded
salt
pepper
¼ can French’s fried onions

Instructions:
In a saucepan, bring 6 cups of chicken broth to a boil; add rice and return to boil.  Reduce heat to low and simmer, covered, for approximately 40 minutes, until rice is cooked.
Meanwhile, place a Dutch oven over medium-high heat.  Add butter, onion, and celery.  Sauté until onion is translucent.  Add garlic and cook for one minute.  Sprinkle flour over vegetables.  Stir and cook until flour browns slightly.  Slowly whisk in 1 ½ cups of chicken broth and ½ cup milk.
Stir in mushrooms, green beans, water chestnuts, chicken, salt, and pepper.  Top with fried onions.
Bake for 25 minutes or until fried onions are golden and casserole is bubbling.

Notes:
Change it up by switching up some vegetables each time you make it.


Tuesday, July 24, 2012

Sushi Salad (4 P+)

Pin It Now!
I didn't grow up eating seafood and have never been a fan.  I'd take a cheeseburger over a lobster any day of the week.  Seriously...if it wasn't breaded and deep-fried I wouldn't eat anything that came out of the ocean.  I love sunfish, walleye, and almost anything else that we used to catch as kids but that's about as far as it goes.

A few years ago I went to a Japanese restaurant with two friends (at their request).  I ordered some kind of chicken and tasted sushi just to get my friends to stop bothering me about it.  It was AMAZING!!  Sushi is now one of my favorite meals.

I have made sushi for the family and it is good but it can be a lot of work.  This recipe makes it a lot easier.

Sushi Salad
6 servings, 60 minutes


Ingredients:
1 cup brown short-grain rice      
2 T rice vinegar      
2 T sugar      
1 T salt      
2 T pickled ginger, finely chopped      
3 green onions, chopped      
1 cucumber, chopped      
1 cup edamame, shelled      
2 t wasabi powder
1 T hot water
2 T soy sauce
1 avocado, sliced
Sushi of choice (crab, tuna, eel, etc)
2 sheets nori, cut into strips
1 T sesame seeds

Instructions:
Prepare rice as instructed on package. 
In a small pan dissolve salt and sugar in rice vinegar over medium heat.  Pour vinegar mixture over rice and mix thoroughly.  Refrigerate until cool.
In a large bowl combine ginger, green onions, cucumber, and edamame. 
In a small bowl combine wasabi powder, water, and soy sauce.  Mix well and pour over rice mixture.  Mix to ensure everything is thoroughly coated. 
Lightly fold in avocado, sushi, and nori. 
Top with sesame seeds.
Notes:
If making this ahead of time, do not put in the avocado, sushi, or nori until serving.

If making this for a crowd don't add the sushi into the salad.  Place bowls of sushi out and let people add the types/amounts that they want.


Leave the sushi out and this could be a great side dish or vegetarian meal.

Tater Tot Hotdish (11 P+)

Pin It Now!
Hotdish?!?  What's a hotdish???

If you are asking yourself that question, you probably aren't from the Midwest.  That's what we call a casserole.  It doesn't include anything special; it's just a bunch of stuff in a pan that's been baked for a while.

This is a great recipe that I made up from what little I know about tater tot hotdish.  It's one of those things where every family makes it their own way.  I actually never had it before I started experimenting but I had a roommate that made it and it looked delicious.

The best thing about this dish is it is EASY!!!  Basically all you do is brown some beef, then open a few cans and throw them in a dutch oven.  45 minutes later you have a meal complete with meat, vegetables, potatoes, and a sauce.  Voila!

Tater Tot Hotdish
6 Servings, 60 minutes
PRINTABLE


Ingredients:
1 lb lean ground beef
½ onion, chopped
1 can condensed cream of mushroom soup
1 can condensed cream of chicken soup
1 can green beans
1 can whole kernel corn
Salt
Pepper
1 cup shredded cheddar cheese
12 oz frozen tater tots

Instructions:
Preheat oven to 375°.
In a Dutch oven, brown ground beef and season with salt and pepper.  Add onion and cook until tender.  Remove from heat.
Stir in soups, vegetables, salt, and pepper.
Top with cheddar cheese.
Arrange tater tots around the top in a single layer.
Bake, uncovered, for 45 minutes or until tator tots are golden brown.

Notes:
This is a great make-ahead recipe.  It can be refrigerated overnight or frozen for a couple weeks.  Be sure to remove as much air as possible before freezing and allow adequate time for thawing before cooking. 

To make this recipe healthier substitute ground turkey for the beef, fresh vegetables for canned, and use fat free or reduced fat soup (9 P+).

Tuesday, January 3, 2012

Slow Cooker Beef Stew (5P+)

Pin It Now!


I love this stew because it's very filling and you can eat a lot of it without using all of you WW P+.  

1 lb Sirloin, cut in ½” chunks
4 Carrots, sliced
2 Parsnips, sliced
4 ribs Celery, sliced
2 Plum Tomatoes, diced
½ Onion, finely chopped
3 c Beef Broth
2 t Fresh Thyme, minced
2 t Fresh Rosemary, minced
1 t Salt
½ t Pepper
5 oz Frozed Peas

Place all items except peas into slow-cooker.  Cook 6-8 hours.  Add peas and continue cooking until the peas are soft.  

Serves 6